PayPal
Integrate PayPal as a payment gateway for your shop.

Admin >>> Shop >>> Settings >>> Payments >>> PayPal


For this gateway to work, you must have a PayPal Business account. You can find more information and register your account here.
Account connection
When you first access to the PayPal gateway screen, you will see an “Activate PayPal” button which you have to click on in order to start the account connection.
This will open in a popup the integrated onboarding, which connects a PayPal account via login credentials (email and password) without the need for API credentials. The onboarding automatically creates a new REST application in the PayPal developer site, registers the webhooks, and enables relevant features such as Vaulting.
You can check the Securely accept all major credit and debit cards on the strength of the PayPal network box (before or after the onboarding), if you want to select between two different credit card processing options:
- Standard Card Processing: PayPal manages card transactions with a user-friendly, pre-built experience, streamlining compliance requirements for all business and casual seller accounts.
- Advanced Card Processing: Only available in selected regions. PayPal acts as the payment processor for card transactions. Card fields are fully customizable and provide optional features like Vaulting or Chargeback Protection for more security. Additional vetting by PayPal is required and prompted automatically during the onboarding.
Enabling PayPal Payments
After completing the connection steps, navigate to the Standard Payments tab and ensure the checkbox next to Enable/Disable is checked. Configure your desired PayPal button appearance and click Save changes to enable PayPal. By default, the PayPal gateway and smart buttons are enabled on the Checkout, Single Product, and Cart pages.

You can also configure the connection manually. For more information about this process, check out the official WooCommerce documentation.
General integration configuration
The integration configuration includes the configuration for various extension behaviors such as the invoice prefix and logging.
- Soft Descriptor: This is a customizable text field where you input a concise description of your business or transaction. This description will appear on the customer’s card statement to help them identify the transaction. It is limited to 22 characters. Please, ensure it accurately represents your business or the transaction to avoid customer confusion.
- Invoice prefix: Use a unique prefix to distinguish invoices, especially, if using one PayPal account for multiple installations. The PayPal invoice number will always correspond to the WooCommerce order number, even if customized. Please use only English letters, “-” or “_” characters for the prefix.
- Logging: Turn on Logging to trace and resolve any transaction issues or for general troubleshooting. It’s especially useful to enable it when encountering unexpected issues, and sharing these logs can aid the support team in addressing your queries more effectively. If everything operates smoothly, you may disable logging. Please note, logs are automatically deleted after 30 days.
- Subtotal Mismatch Behavior: This setting deals with the discrepancies between WooCommerce and PayPal in subtotal calculations due to rounding differences. Selecting “Do not send line items to PayPal” eliminates any discrepancies by not sending individual line items, but results in an empty order details list on PayPal. To preserve order details on PayPal and correct any mismatch, choose “Add another line item.”
- Subtotal Mismatch Line Name: This setting is available when “Add another line item” is selected above. It allows you to designate the name of the additional line sent to PayPal to rectify the subtotal mismatch, ensuring that PayPal accurately receives all order details.
General settings for PayPal Payments
You can configure diverse settings for your PayPal Payments gateway.
Standard Payments settings screen
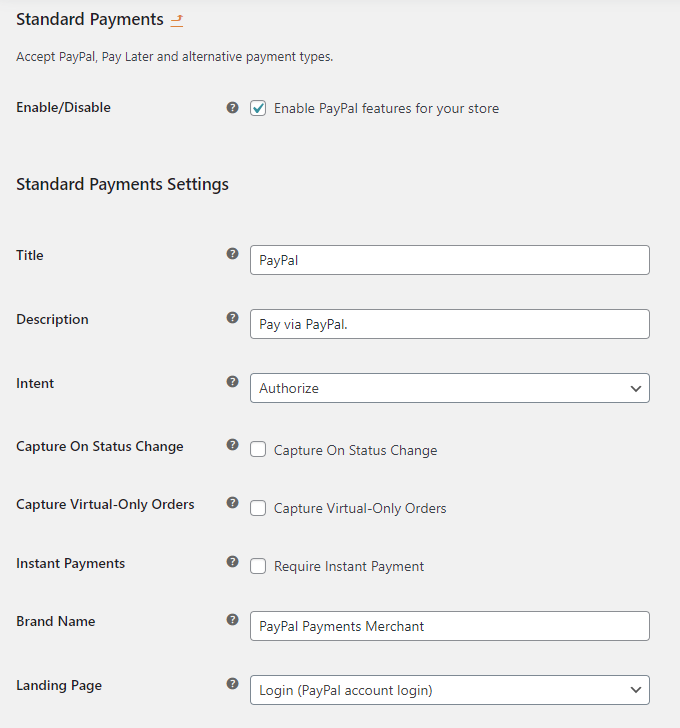
- Enable/Disable: Enable the PayPal Gateway checkbox to display PayPal smart buttons in your shop.
- Title: The title for the PayPal gateway the user sees during the checkout process.
- Description: The description the user sees during the checkout process.
- Intent: The intent is to either capture a payment immediately after an order is created or authorize a payment for later capture. When configuring Authorize intent, automatic payment captures can be configured for virtual products or when changing the order status.
- Instant Payments: If you enable this setting, PayPal will be instructed not to allow the buyer to use funding sources that take additional time to complete (e.g., eChecks). Instead, the buyer will be required to use an instant funding source, such as instant transfer, credit/debit card, or Pay Later.
- Brand Name: Control the name of your shop that customers will see during the payment process.
- Landing Page: Type of PayPal page to display in the popup after clicking the button.
Remember to click the “Save changes” button to register the modifications.