Cecabank
Enable Cecabank gateway by sending the user to your bank TPV.

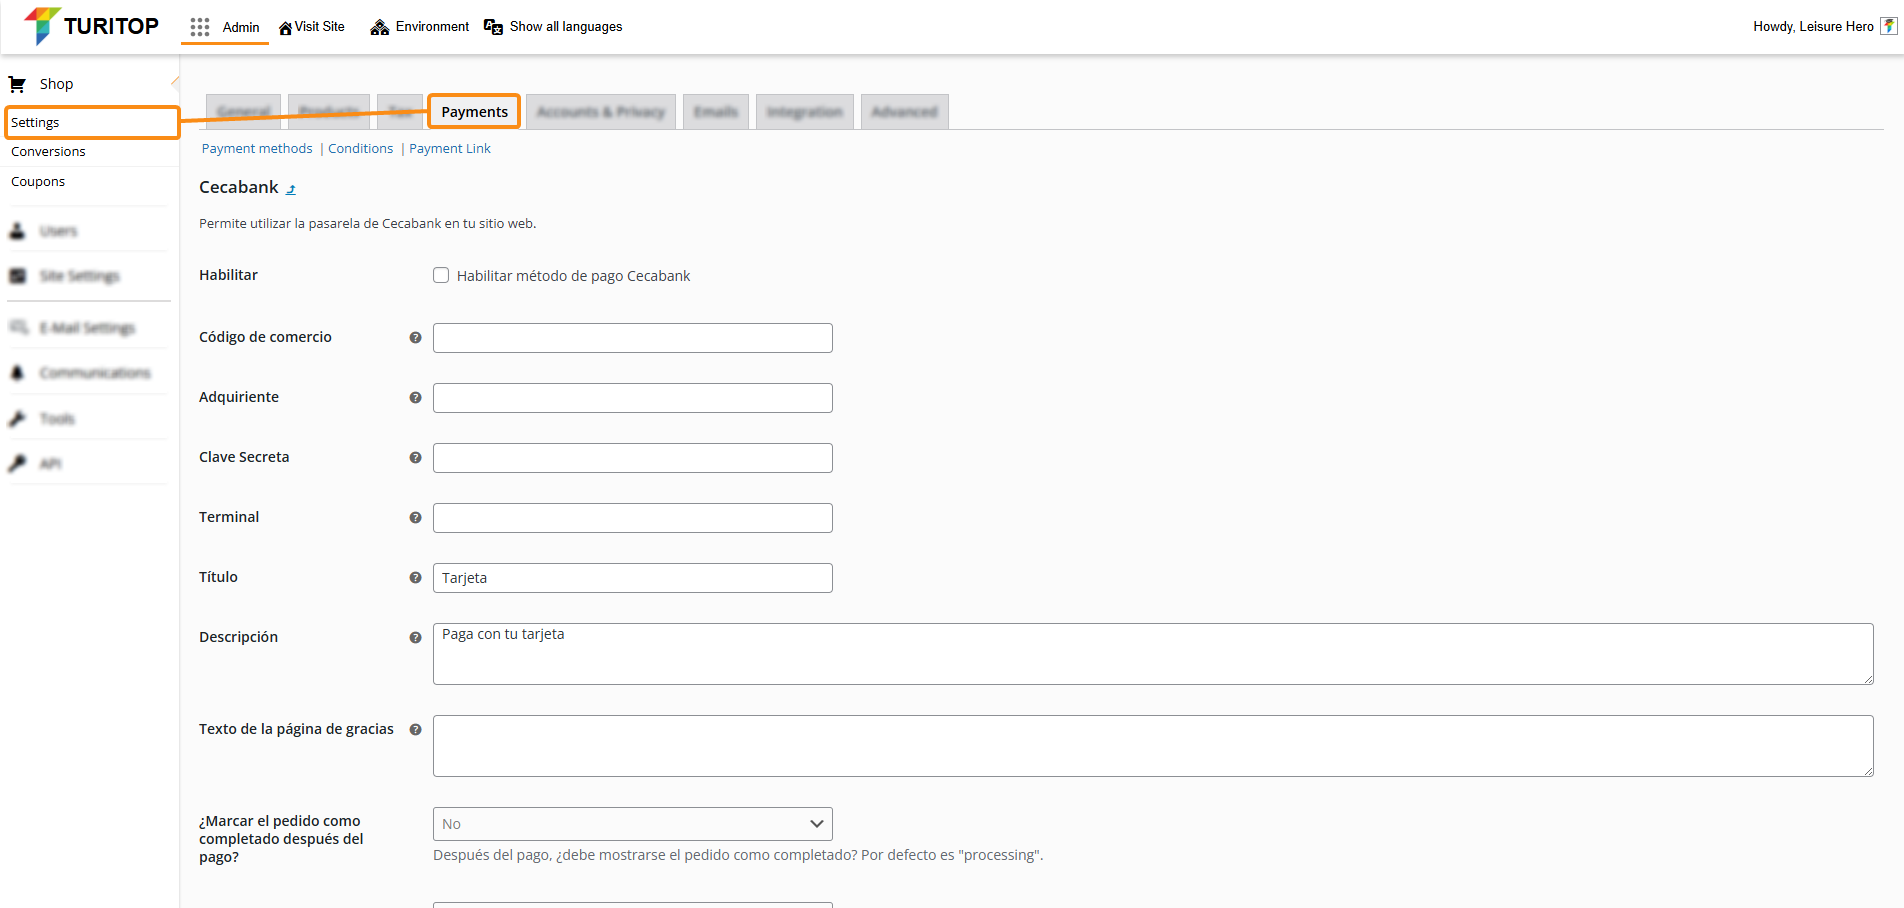
Admin >>> Shop >>> Settings >>> Payments >>> Cecabank
Enable Cecabank Gateway
To enable the Cecabank gateway, you first have to talk to your bank so they can provide you with the mandatory configuration fields needed (Commerce Code, Acquirer, Secret Key, and so on). Once you have this information, you can proceed to check the “Enable Cecabank payment method” box and fill in all the information, such as:
- Commerce code: Commerce code provided by your bank.
- Acquirer: Acquirer provided by your bank.
- Secret key: The secret key provided by your bank.
- Terminal: The Terminal number provided by your bank.
- Title: The title for this payment method.
- Description: A short paragraph that will be shown to the client in the purchase process.
- Thank you page text: The text users will see after a successful purchase.
- Mark the order as completed after payment?: Enable it to set the order status to “Completed” after payment. By default, the status will be “Processing”.
- Environment: Select “Test” or “Real”. The first environment should be “Test” in order to make the mandatory tests required by your bank.
- Icon: Here you can set and URL to a custom icon file to replace the default one.
Configuration for ABANCA clients
If you are a client of ABANCA bank, below you can watch a short video (in Spanish) explaining the process to enable the Cecabank gateway in our system:

Remember to click the “Save changes” button to register the modifications.