PayU Latam
With PayU Latam, you can receive online payments made with credit cards, bank transfers, cash and more.

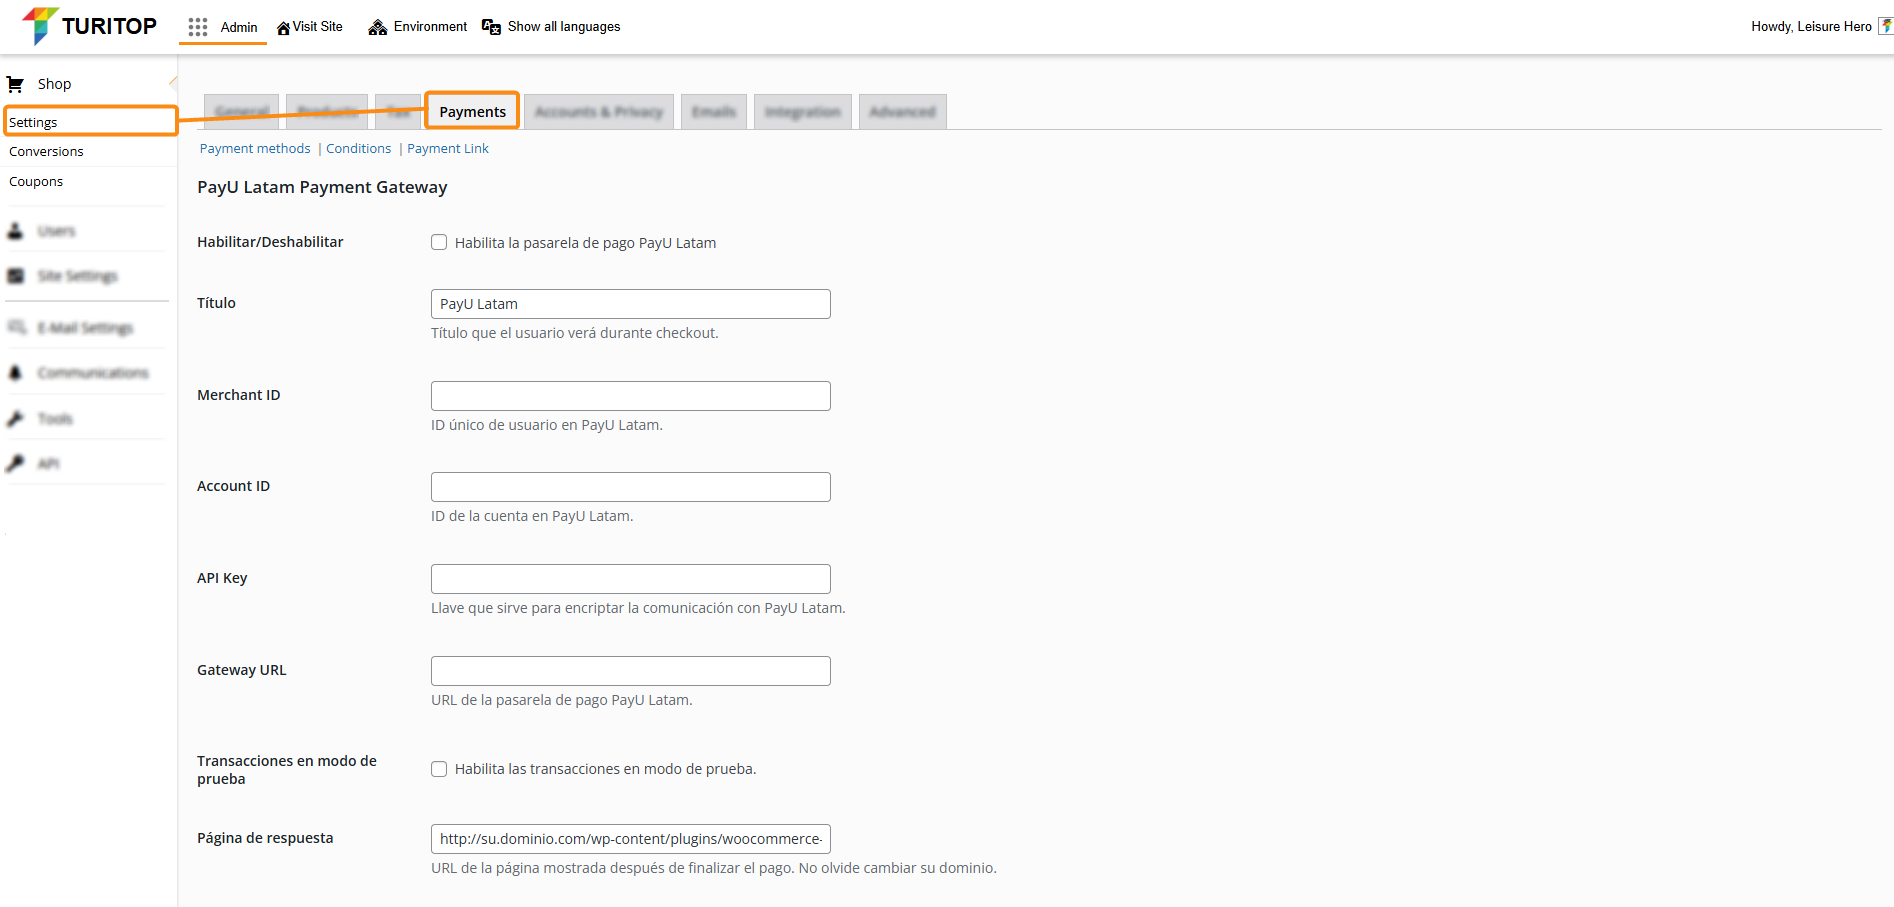
Admin >>> Shop >>> Settings >>> Payments >>> PayU Latam
Enable PayU Latam Gateway

Don’t have a PayU Latam account yet? Find more information about the registration process here.
To enable the PayU Latam gateway, you first need to access your account dashboard and get the mandatory configuration fields (Merchant ID, Account ID, etc.). Once you have this information, you can proceed to check the “Enable PayU Latam” box and configure it:
- Enable / Disable: Mark this checkbox to enable the payment gateway in our system.
- Title: Title displayed for the Payment Method. The default value is “PayU Latam”.
- Merchant ID: ID of your commerce in PayU Latam.
- Account ID: ID of the PayU account according to the country where you want to sell.
- API key: Unique key of your commerce (you can find this key in the PayU module).
- Gateway URL: Gateway URL. For testing, you can use https://sandbox.gateway.payulatam.com/ppp-web-gateway, and for production https://gateway.payulatam.com/ppp-web-gateway.
- Transaction in test mode: Mark this checkbox to make transactions in test mode.
- Response page: URL of the response page. By default, the URL is https://your.domain.com/wp-content/plugins/woocommerce-payu-latam/response.php, you must replace https://your.domain.com with your site’s domain.
- Confirmation page: URL of the confirmation page. By default, the URL is https://your.domain.com/wp-content/plugins/woocommerce-payu-latam/confirmation.php, you must replace https://your.domain.com with your site’s domain.

Remember to click the “Save changes” button to register the modifications.